Record with the Mac screenshot toolbar
Press Shift-Command-5 and select the entire-screen or selected-portion recording control. Open Options to check the save location, microphone and timer before starting.
Start recording, then stop using the menu-bar stop control or Command-Control-Escape. QuickTime Player also offers File > New Screen Recording, which can open the same controls. Protected content may prevent recording.
Make a short test first
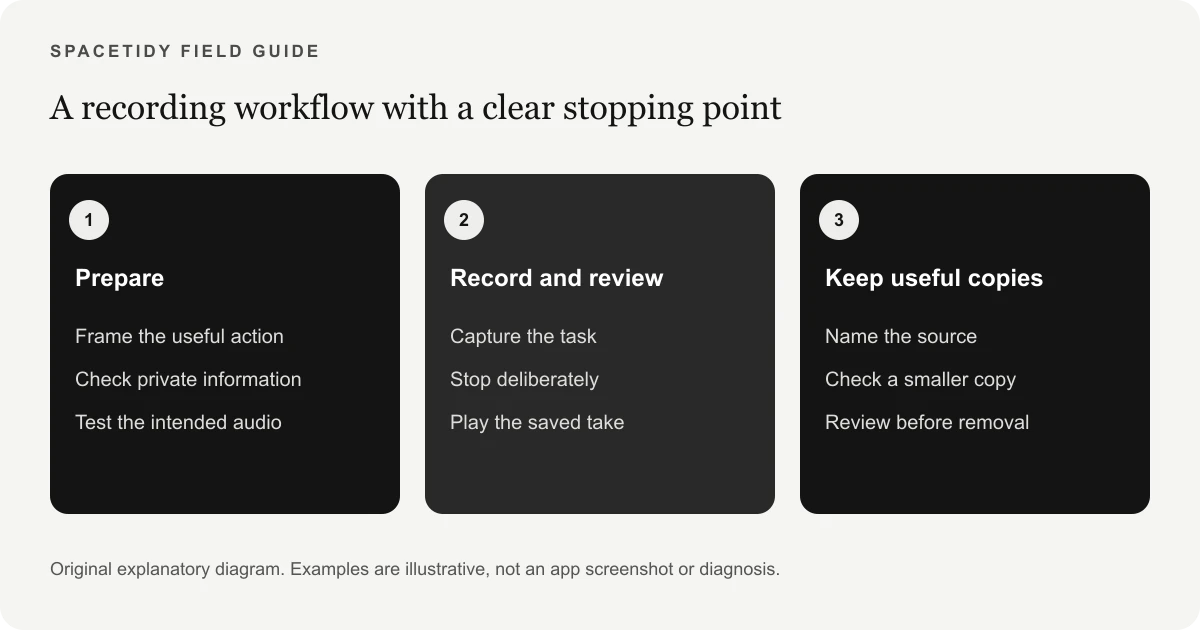
Record a short sample and play it back before capturing a long tutorial. Check that the intended window is readable and that any microphone you selected is audible.
Microphone recording and capturing the computer’s own audio are different requirements. Available audio options depend on software and setup; check Apple’s current guide instead of assuming every Mac records internal audio.
Keep the frame focused
Hide personal information and unrelated windows before recording. A selected portion can keep attention on the task and reduce visual distractions.
Plan a short outline so you can stop when the demonstration is complete. Fewer unnecessary minutes also mean less footage to inspect, share and store, although file size depends on more than duration alone.
Plan a recording someone can follow
Write a short outline with a beginning, the action you want to demonstrate and a clear stopping point. If you are explaining a setting, decide which screen needs to be visible before you start. If you are reporting a bug, plan to show the smallest sequence that reliably illustrates the problem without exposing private material. A focused recording is easier for someone else to understand and easier for you to review afterward. It also avoids storing long stretches of unrelated activity simply because the recorder was left running.
Set up a clean demonstration environment that still looks realistic. Close unrelated documents, check notifications and remove account details from the intended frame where practical. Use disposable sample content when the task involves messages, customer information or a private project. Do not assume a later crop will protect everything: audio, notifications and reflected context can reveal information too. Planning the visible task before opening Apple’s screen recording controls is a workflow choice, not an extra app requirement. You can use the Mac’s built-in recording tools without purchasing SpaceTidy.
Choose the smallest useful capture area
An entire-screen recording is convenient when the task moves between several windows. A selected portion can be clearer when one panel or small interface contains the relevant action. Choose the frame based on what the viewer needs to understand. If the selected area cuts off a menu, an important warning or a confirmation button, enlarge it before recording. Leave enough context to show which app or document is involved without filling most of the frame with unrelated desktop space.
Make text readable at the size where the recording will actually be watched. A demonstration that looks clear on your large monitor may be difficult to follow in a small embedded player or a message preview. Try playing a short sample at that expected size. If labels become unreadable, simplify the frame or adjust the demonstration rather than assuming the viewer will zoom in. File-size reduction should come after this usability check. A highly compressed recording that hides the steps does not meet the purpose of a tutorial, even if the file is easy to upload.
Test the exact audio path you intend to use
Decide whether the recording needs your narration, the computer’s own sound or no audio at all. These are separate requirements. A microphone selection is not proof that the computer’s internal audio will be captured, and a silent technical demonstration may be perfectly adequate when the actions are visible. Make a short test using the settings and equipment you intend to use for the real session. Then play the saved file, rather than judging only from what you heard while recording.
Listen for understandable speech, unexpected background noise and whether the recording contains the intended sound. If you switch microphones, connect headphones or change the setup after the test, check again before the important take. Available system-audio options depend on macOS and the tools in use; follow Apple’s current documentation for your version instead of buying an unrelated cleaner to solve an audio-routing question. For a work or school device, also respect the organization’s recording rules and any requirement to inform participants. The simplest successful setup is the one you have actually verified.
Make recording files easy to find later
Choose a destination you can identify before recording a long session. A dedicated folder for a project or support case is easier to manage than a desktop filled with similarly named clips. After the recording completes, rename the useful take with a short description and date. Avoid putting passwords, private customer details or sensitive account identifiers in the filename, especially if you may share the file. Keep any notes that explain what the clip shows beside it rather than relying on memory a month later.
Separate raw takes, working edits and final sharing copies when the project needs all three. That does not require a complicated filing system: a small number of clearly named folders can be enough. The key is to know which file an editor or document references before moving it. Two videos that appear identical can serve different purposes in a project. Our Mac storage guide explains why location and dependency matter when reviewing large files, even when the contents of two copies match.
Use a clear before-and-after size calculation
Suppose a source recording is 800 MB and a smaller sharing copy is 300 MB. The output is 500 MB smaller than the source, but keeping both means you now have 1,100 MB of logical file data. This is an illustrative calculation, not a promised compression result. It explains why creating a smaller copy is not the same action as freeing disk space. You still need to decide which versions are useful and whether the source should remain available for editing or archival purposes.
The potential saving also depends on what happens after a separate removal decision. A source moved to Trash may still occupy storage until you review and empty Trash yourself. A file in a synced folder may have additional cloud or local-copy behavior. Measure the actual storage result after the relevant processing settles instead of treating the output’s displayed size as a guaranteed increase in free capacity. The compression guide develops this copy-first approach for iPhone, iPad and Mac, including the quality checks that should happen before you remove an original.
Review recordings with the right SpaceTidy tools
SpaceTidy for Mac can inspect an accessible folder you choose, show large files and map their relative sizes. These basic scans help you identify which recordings deserve attention first. A large block in the map is an invitation to inspect a file, not a recommendation to delete it. Open a candidate and establish whether it is a raw take, a finished version or a dependency in another project before making a change. The app cannot infer every reason you may have for keeping a recording.
Pro adds separate-copy video compression and reviewed supported moves to Trash. It does not turn the website demo into a recorder, and it does not repair a broken audio track simply by making the file smaller. The app’s output checks and your own playback review serve different purposes. Check the pricing feature list for the current boundary between free inspection and paid actions. You do not need a SpaceTidy account to explore the supported workflow, and a hardware troubleshooting issue should still follow the appropriate Apple support route.
Build a simple recording review routine
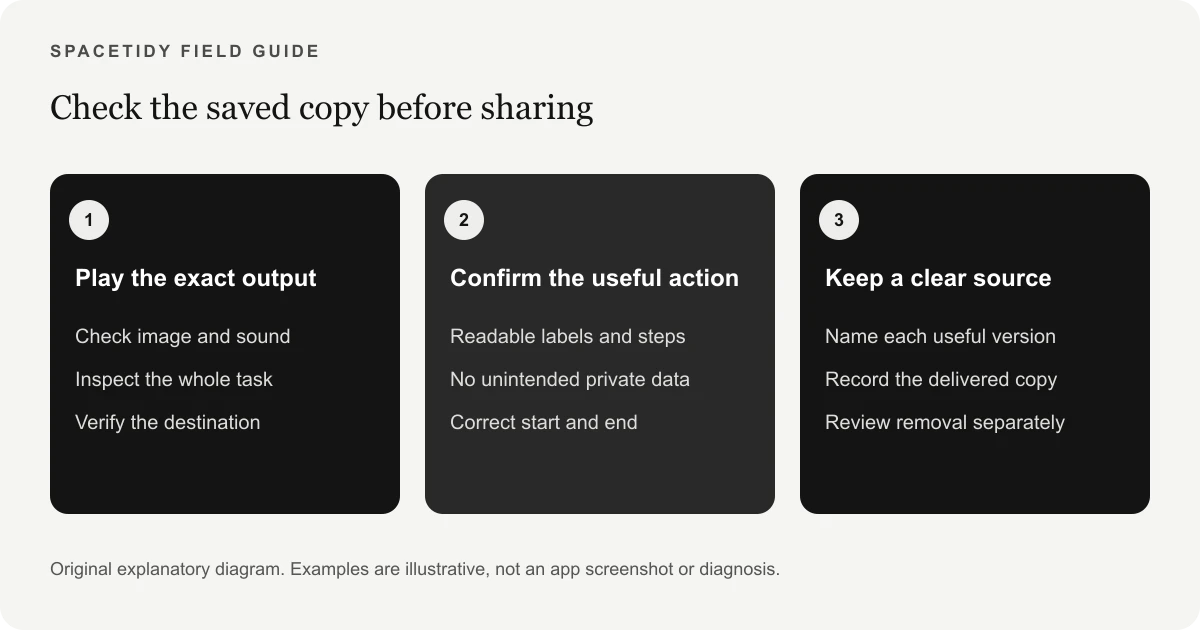
At the end of a recording session, play the useful take, give it a recognizable name and note whether a smaller copy is needed for its destination. Keep failed takes only if they contain something worth recovering. Before removing them, confirm that the final take actually opens and includes the important action. A quick review while the context is fresh is more reliable than selecting a month of vaguely named videos later. For recurring work, keep a short checklist with the same capture area, audio test and destination checks.
If storage remains a problem, review completed projects as a separate session rather than interrupting every recording to chase a precise savings target. Keep the source for anything that may need re-editing, and verify a backup for recordings that cannot be recreated. You can archive an important original and retain a smaller everyday copy when that suits the project, provided you can still find and open the archive. The objective is useful footage and a storage arrangement you understand, not the smallest possible file at the expense of clarity or recovery.
A final playback and sharing check
Before sending the file, open the exact copy you intend to share. Confirm that it shows the relevant steps, starts and ends where expected and contains no private information you meant to exclude. If you created several exports, do not rely on a similar thumbnail to select the right one. Check its name, location and playback. For an important handoff, test the file in the environment where you expect it to be used when practical, rather than assuming that success in one player proves every destination will accept it.
Keep a brief note of which copy you delivered and which original you retained. That prevents a later storage review from treating the only editable source as an unnecessary duplicate. If the destination rejects the file, read its actual requirements before generating another version. You may need a different sharing arrangement rather than repeated compression. A clear final check saves the viewer from guessing and saves you from accumulating several almost-identical files with no record of which one was useful.
Review large screen recordings
Use a recognizable destination folder and descriptive filenames. Before removing a recording, check whether it is the source for an editing project or the only copy of an important demonstration.
SpaceTidy’s free selected-folder scan and space map can help find large recordings on Mac. Pro supports reviewed file moves to Trash and video compression into a separate smaller copy. Size savings vary with the source.
Check a compressed copy before cleanup
Play the output and inspect small text, pointer movement and audio. A small file that makes a tutorial unreadable is not a useful replacement. Keep the original until the result suits your purpose.
Compression creates another file, so it does not immediately recover the original’s space. Remove an unwanted source only as a separate reviewed decision, and keep project dependencies or archival requirements in mind.
Sources & further reading
Apple menu names and options can vary by software version. These official guides explain the system behavior referenced above.